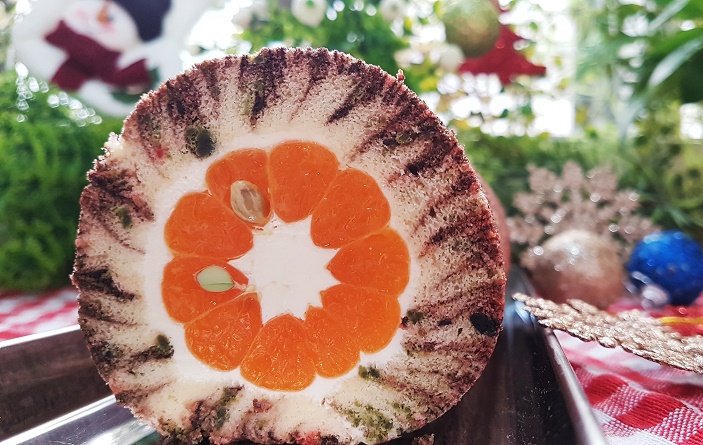
Hurricane Yuletide Log
By Lily Thoo
Let this eye-catching yuletide cake steal the thunder from the usual log cake. It may appear complex but it’s achievable using tried and tested techniques that Lily Thoo has perfected over countless attempts. What a delightful way to cap your Christmas dinner with a sumptuous menu comprising mains including Orange-glazed Roast Chicken, Roast Iberico Pork and sides like Butternut squash soup and Focaccia bread.
Total Time: 3 hours
Difficulty: 4/5
Cost: S$12.00
Servings: 10
A: Cocoa, Beetroot, Matcha Pastes
2 teaspoons dark cocoa powder
2 teaspoons beetroot powder
2 teaspoons matcha powder
3 tablespoons hot boiling water
B: Egg-yolk Mixture
50ml milk
75ml corn oil
75 cake flour
5 egg yolks*
¼ teaspoon salt
1 teaspoon vanilla paste
C: Egg-white Mixture
5 egg whites
¼ teaspoon cream of tartar or lemon juice
85g castor sugar mixed with 10g cornflour
D: Tangerines, Whipped Cream
10 – 12 mini tangerines, peeled and kept whole
250g whipped cream*
E: “Snow”
5 tablespoons icing sugar
DIRECTIONS:
1. Line a 10″x 12″ baking pan with baking paper or silicone baking sheet with an overhang of 5cm. Use paper clips to secure it in place. Preheat oven to 170°C. Place a baking tray in the middle rack.
2. In individual bowls, mix flavouring agents (A ingredients) with 1 tablespoon hot boiling water each to a smooth paste. There should be 3 separate bowls of flavoured pastes – cocoa, beetroot and matcha. Set them aside.
3. Combine oil and milk in a mixing bowl. Put it in a double boiler. Heat it up until temperature reaches 70°C – check with a food thermometer. Alternatively, heat up over low heat for 1 minute 10 seconds. Remove bowl from the double boiler.
4. Pour in flour, all at once. Whisk until batter looks like a paste. When batter has cooled down, whisk in egg yolks one by one. Add salt and vanilla paste, whisking well until well blended.
5. Measure out 3 portions of egg yolk mixture at 46g each. Whisk in 3 different colour pastes – cocoa, beetroot and matcha. Leave remaining yolk batter as cake base. Spray a thin layer of water on top of each coloured batter to prevent them drying up. Cover and set aside.
6. Using an electric hand beater, beat egg whites till frothy. Add cream of tartar gradually and continue beating till thick and foamy. Add in the castor sugar mixture in 3 additions, beating until firm peaks form. Measure out 3 portions of egg white mixture at 38g each. Set them aside.
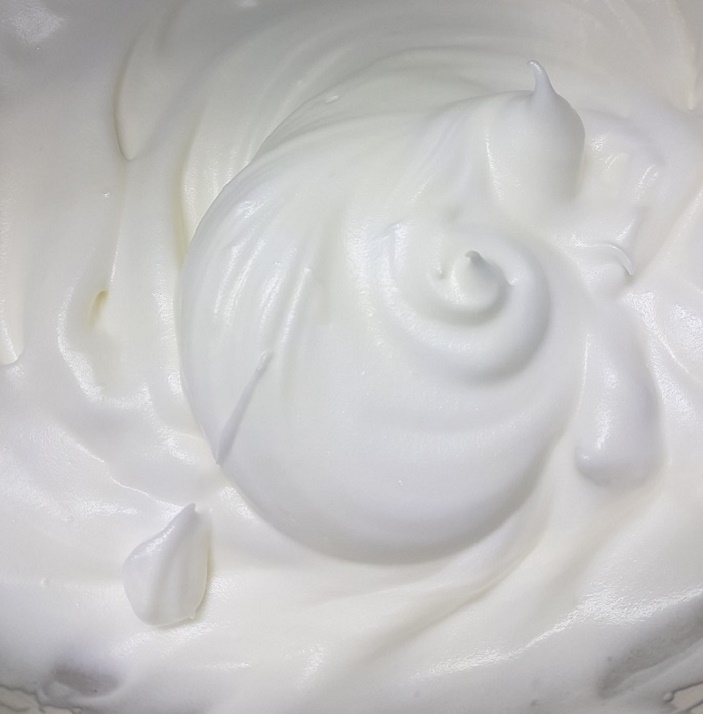
7. From remaining egg white mixture, take out half portion – gently fold it into yolk mixture in 2 additions blending well after each addition. Pour batter into prepared cake pan. This is the 1st layer of batter which forms the cake base. Tap pan against kitchen bench a few times to release any air bubbles trapped in the batter.
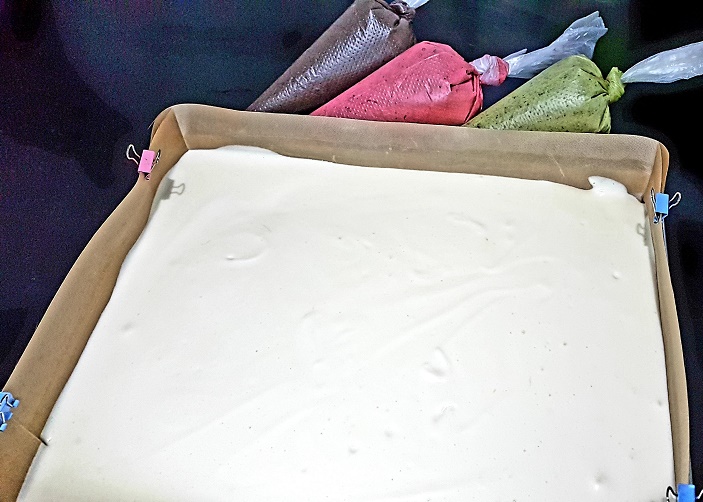
8. Coloured batter: This 2nd layer comprises coloured batter with 3 flavours: cocoa, beetroot and matcha. Gently fold 20g of egg white mixture into the cocoa paste; followed by remaining 18g until evenly blended (see Techniques). Do the same for the other 2 pastes. You’ll get 3 batches of batter in different colours. Pour each batter into individual piping bags – this makes it easier to distinguish the different flavours.
9. Placing tray horizontally, pipe coloured batter into cake pan, starting with matcha, followed by beetroot and then cocoa. Repeat until all the batter is used up.
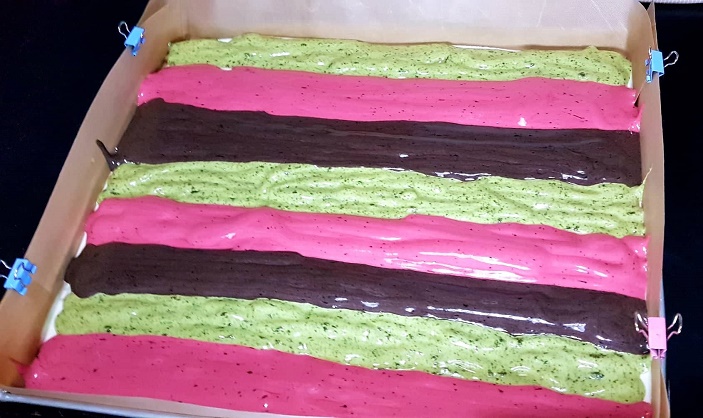
There should be horizontal rows of batter in green, red and chocolate colours (see photo).
10. Using a spoon handle, insert it into cake pan until it touches the base. Slowly drag it to draw vertical lines – start from top left. Continue ‘drawing’ lines without lifting spoon until vertical lines are completed. Immediately continue to ’draw’ horizontal lines – do not lift up spoon handle. You’ll begin to see a ‘hurricane’ motif emerging.
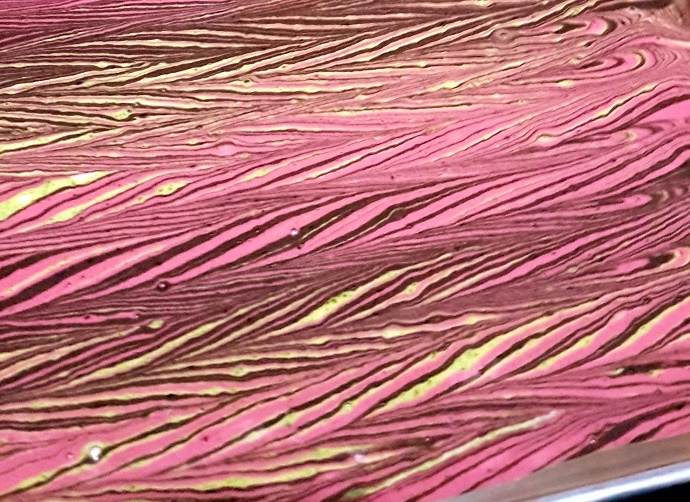
11. Gently tap pan against kitchen bench to remove any air bubbles. Bake for 15 minutes. After 15 minutes, open oven and turn baking tray around – this ensures the cake is evenly baked. Lower oven temperature to 140°C. Continue to bake for another 15 minutes or until cooked.
12. Remove the cake pan from the oven. While still hot, lift the pan up using oven mittens. Drop it from a height of 13 cm onto the kitchen bench. Repeat action thrice – this prevents the cake from shrinking. Allow the cake to sit in the pan for 2 minutes.
13. Gently slide the cake onto a wire rack. Cover the top of the cake with clean baking paper. Holding bottom of the cake base firmly, gently flip it upside down. Peel off bottom baking paper and cover it with clean baking paper. This helps the cake to remain moist. Allow the cake to cool down for 25 minutes.
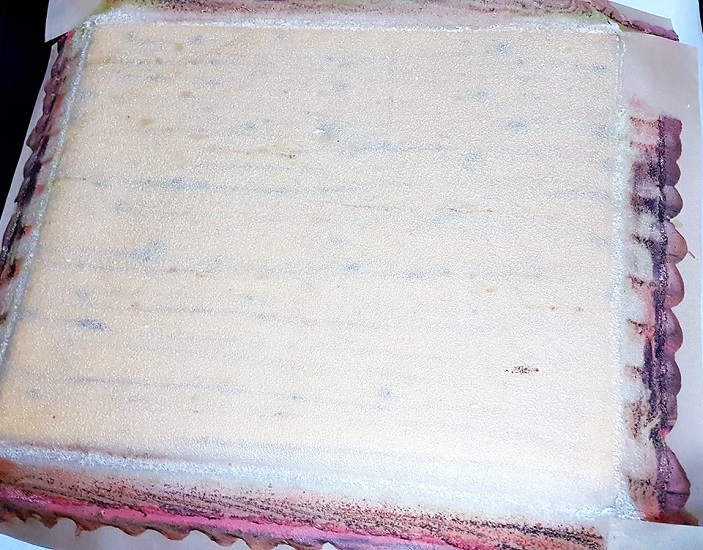
14. Fill piping bag with 2-3 tablespoons of whipped cream. Pipe cream into the centre of each tangerine.
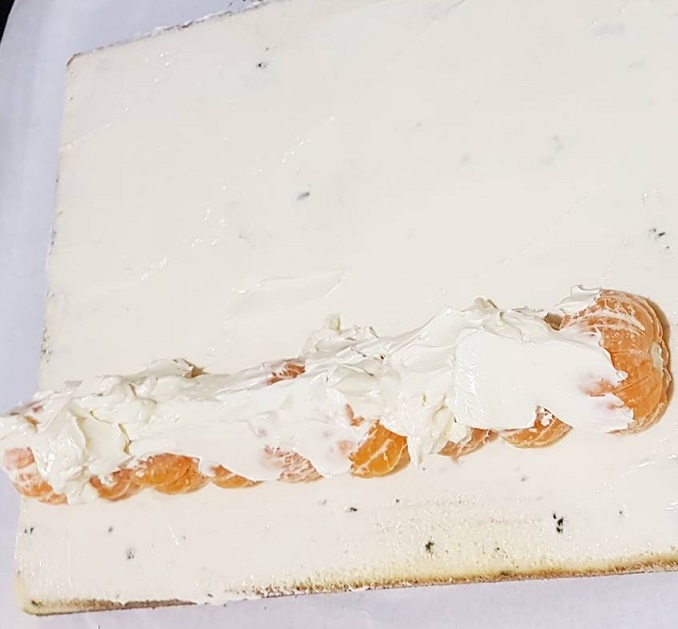
15. Position cooled cake horizontally with the skin side facing down. Spread cream all over the base of the plain cake. Arrange tangerines in a horizontal row (see photo). Spread cream on top of the fruit. The cream holds tangerines together and keeps them in place. Holding the baking paper, use it to carefully and gently guide you while rolling up the cake – roll it tightly to retain its shape. Refrigerate at least 4 hours or overnight.
16. Peel away baking paper – you will notice that the skin of the cake will also come out at the same time. To assemble: starting at right end of cake, cut out 1 piece measuring 4-5cm. Next, slice it at an angle. Do the same for left end of cake. There will be 2 pieces. Attach both pieces to 1 end of the log by brushing it with melted marshmallow. See photo below.
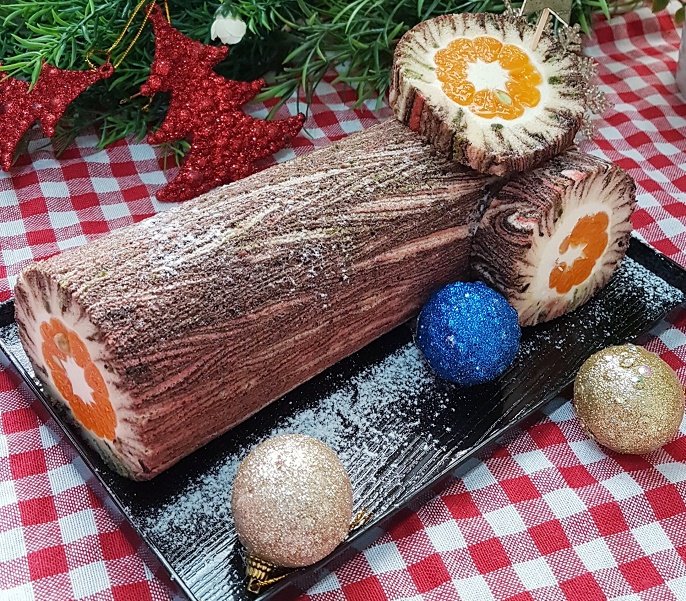
Dust with icing sugar. Refrigerate cake until ready to serve.
17. Alternatively, if pressed for time, omit tangerines for a plain Hurricane Cake.
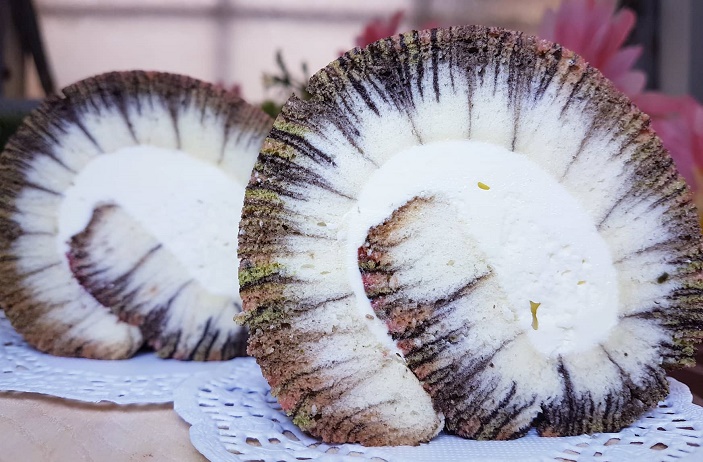
NOTE: Eggs in this recipe weigh between 63g-65g. Alternatively, make your own Swiss Meringue buttercream – it has a more sturdy structure and does not melt as easily in tropical weather.
TECHNIQUES: For a defined hurricane motif (see photo below), while ‘drawing’, drag spoon handle slowly and steadily through the batter with a consistent width.
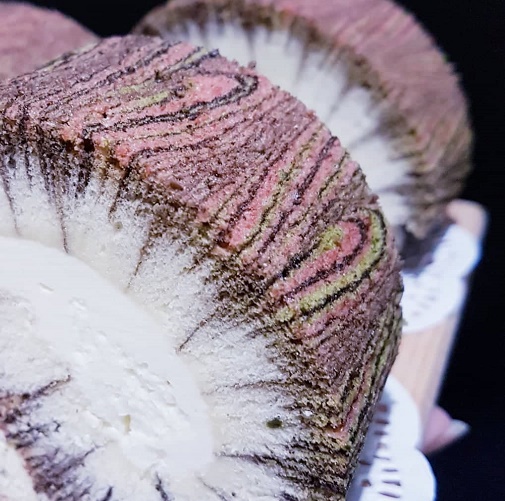
When combining 2 ingredients with different viscosities such as cocoa paste (higher viscosity, hence thicker and less runny) and egg white mixture (more fluid with a softer structure), it needs to be done in 2 steps. First, fold a small quantity of egg white mixture into the cocoa paste to make it lighter – this makes it easier for the cocoa paste to be incorporated when the remaining whipped egg white is added.
Photos: Lily Thoo
Click on www.storm.sg/food for more recipes and reviews of restaurants.
If you have a simple recipe you would like to share, do email it to whipitup@storm.sg
You Might Like To Try These Recipes:
Html code here! Replace this with any non empty text and that's it.


