


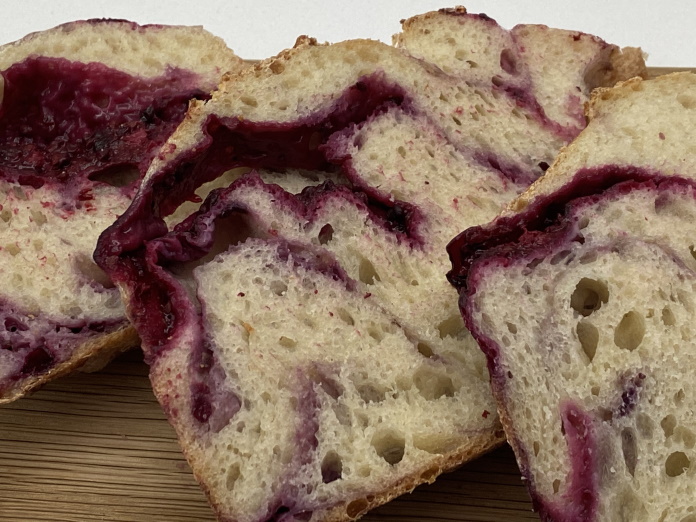
SOURDOUGH has been the obsession in culinary circles amidst the pandemic. Natural leaven, concocted from flour and water until it is colonised with natural bacteria replaces commercial yeast to transform shaggy dough into a crusty loaf. Luscious, succulent blackberries punctuate this bread with an intense, deep purple releasing juiciness with each mouthful. Olive oil may seem an odd addition but it moistens the crumb rendering it tender and makes it so much easier to slice. All this boule needs is cold, high-butterfat butter. Let it melt slowly into the crumb and onto your fingers. Homebaked bread just doesn’t get any better than this.
Total Time: 2 days including overnight proofing in the fridge
Difficulty: 3/5
Cost: $9.00
Yields:1 x 900g boule
A: Wet Ingredients
155g sourdough starter, 100% hydration, fully active*
16g olive oil
280g water
B: Dry Ingredients
490g bread flour*
10g salt
C: Fresh Fruit
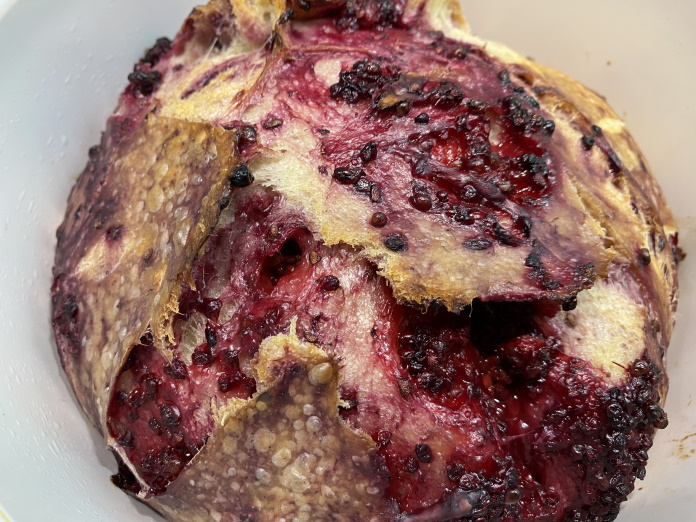
150g blackberries, blueberries, raspberries or cherries
DIRECTIONS:
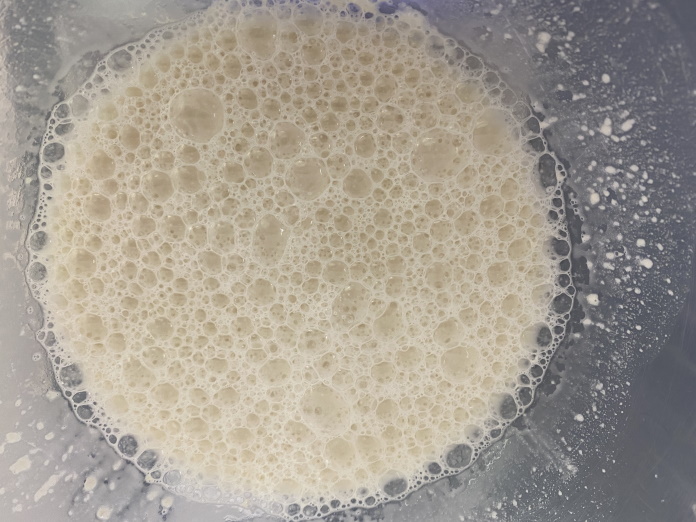
1. In a large mixing bowl, combine starter, water and olive oil. Using your hands, agitate the mixture until a frothy solution forms.
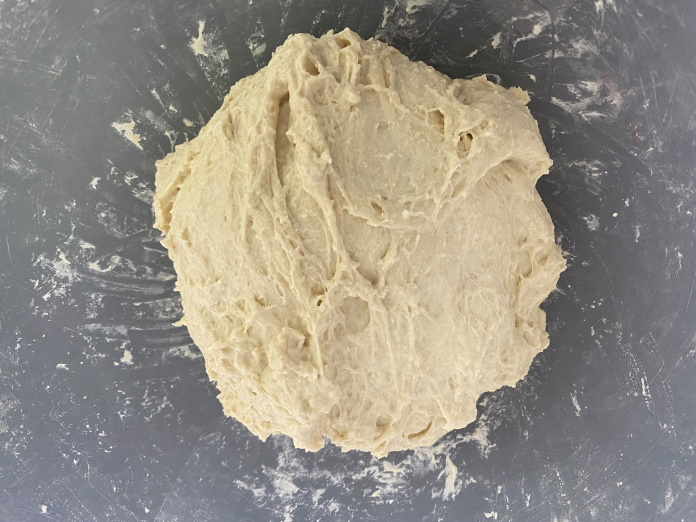
2. Pour in flour followed by salt. Mix until a shaggy dough forms. Leave it to rest 15 minutes.
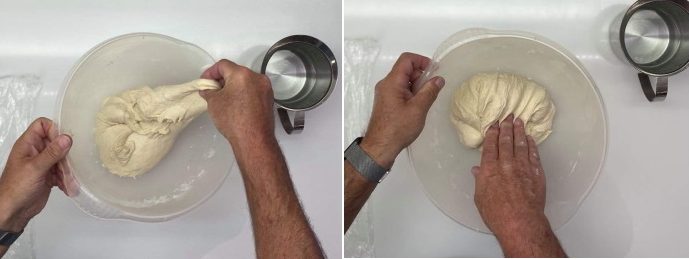
3. Wet your dominant hand, reach into mixing bowl; pull to stretch the dough, then fold it over while rotating the bowl with your other hand. Stretch and fold approximately 20 times.
To prevent dough sticking to your fingers, dip into a glass of water; flick your hand to shake off excess water before starting your stretch and fold.
Stretch-and-fold is a technique often employed in sourdough baking to aid the development of gluten. It helps the dough to hold its shape before and during baking.
4. Leave to rest for 15 minutes, covering bowl with cling film. Repeat this process thrice – stretch and fold 10-15 times at 15-minute intervals.
5. Allow dough to rest for 4 hours at room temperature until it rises and becomes wobbly – this is the 1st prove which is known as bulk fermentation, a term that is often used in commercial baking.
6. Toss in berries all at once, gently incorporating them into the dough with your hands without squashing them. Gently shape it into a round ball of dough.
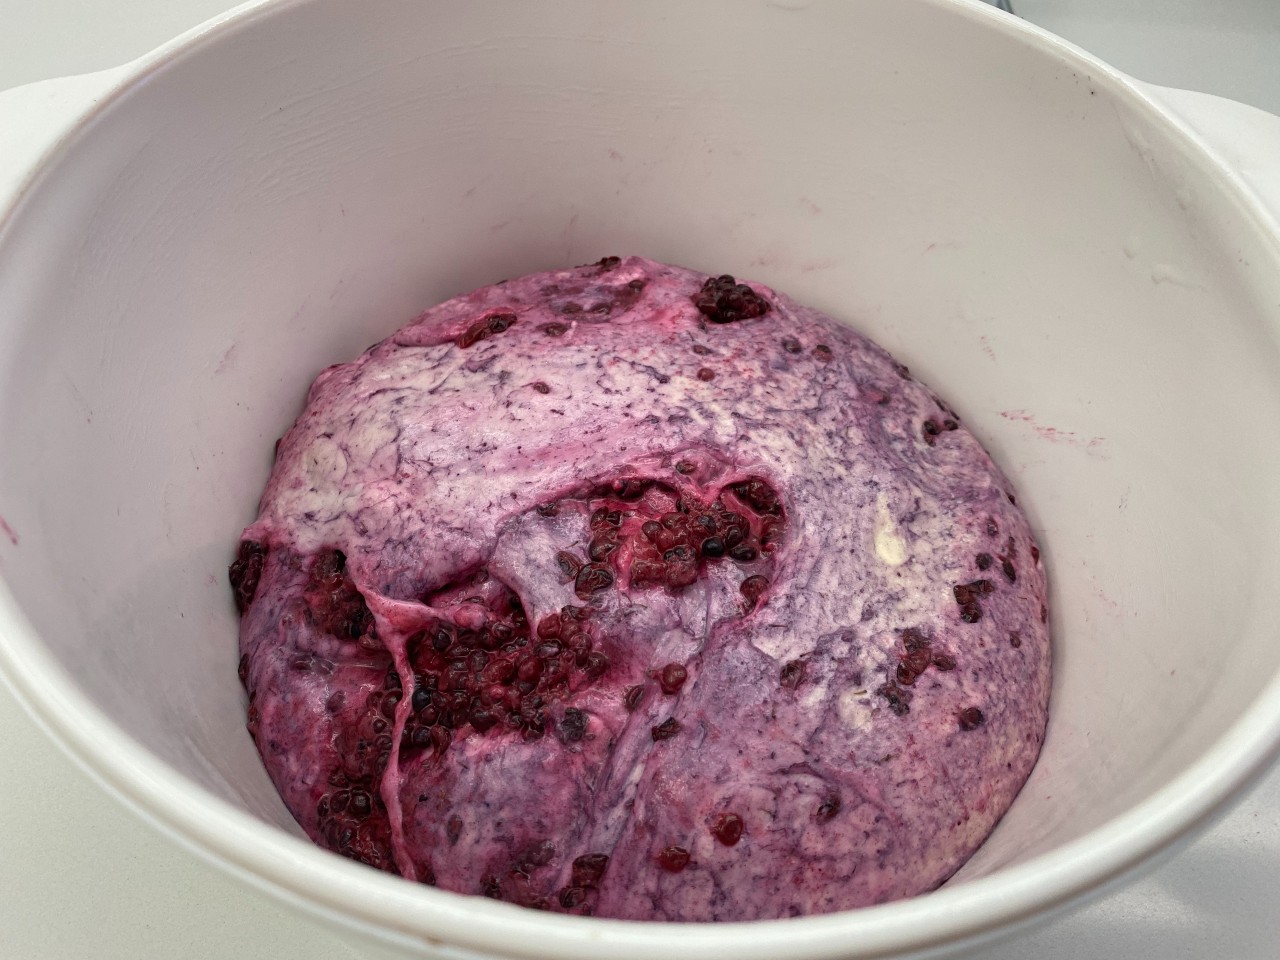 7. Transfer dough into a proofing basket — banneton (made of rattan, this is ideal for sourdough) or any receptacle large enough to hold it. Cover with a thick kitchen towel. Place it in the refrigerator for an overnight retard of 9-24 hours.
8. The next day, using a silicone spatula, gently release dough from the bowl onto non-stick baking paper, 25cm x 28cm or measured to fit the baking vessel.
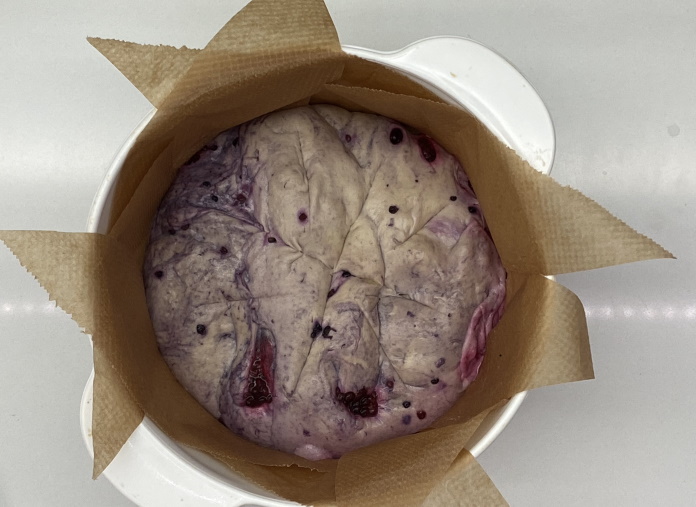
9. Preheat oven to 210°C for 30 minutes.
10. Meanwhile, transfer pot with dough lined with non-stick baking paper to the freezer for at least 10 minutes. This blast chilling firms up the dough, creating a taut surface that makes it easier to score or slash the dough.
11. Remove dough from the freezer. Using a razor blade, score it; position it blade at an angle on the dough as if you’re filleting a fish. Let vessel cool to room temperature for 10 minutes before putting into the oven to bake.
A Dutch oven is often employed in sourdough bread baking for its ability to retain heat throughout the baking process. Good alternatives include casserole pot, covered metal pot, cast-iron saucepan with a large stainless bowl acting as a cover or even a Chinese claypot. Ensure that the baking vessel can withstand high oven temperatures of up to 250°C.
12. Bake for 40 minutes. Open up oven to remove cover of baking vessel. Continue baking a further 10-15 minutes until the desired crust colour forms.
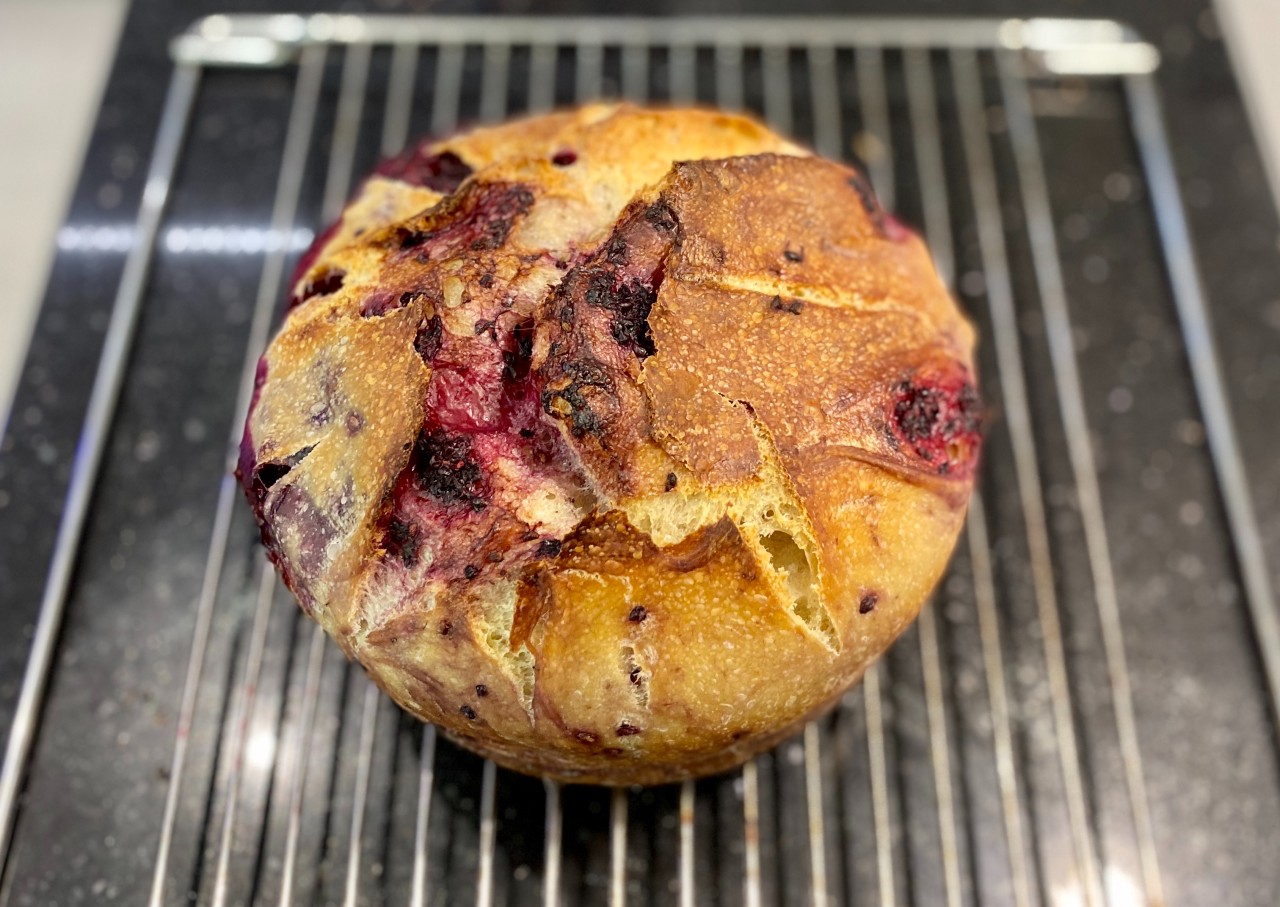 13. Remove bread from oven. Using oven mittens, tap it on the bottom crust. If you get a hollow sound, the bread is cooked. Otherwise, return it to the oven and continue baking. Transfer immediately to a wire rack to cool down completely for at least 1½ -2 hours. Resist the temptation to slice the bread while it is steaming hot – the crumb continues to cook until it cools down. If sliced before it has cooled down, the crumb becomes gummy.
Enjoy it toasted with cold butter, nothing else.
TIP: A good way to ascertain that bread is cooked is the aroma of freshly baked bread wafting from the oven. If a darker crust is preferred, continue baking until it is done.
When you open the oven door, the aroma will greet you. Using oven mittens, take out the bread, taking care not to get burned. Alternatively, gently pick it up and give it a good sniff, the way Edwards does it.
TECHNIQUE: Scoring is making an incision on the surface of the dough with the aid of a razor blade or a super sharp knife. Score at an angle, as if you’re filleting a fish. It creates an opening to direct steam formed during baking to escape, allowing the dough to expand without bursting the skin.
When mixing the dough, expect variations in the absorption of water as the texture of flour varies from country to country depending on where it is milled. Start by adding 3/4 of the water; mix well, adding more water if required, until a ball of dough forms.
*Starter: For time efficiency, join an online sourdough group in your neighborhood and you can easily request for a portion from group members. Treat this as your mother starter and store it in a clean jar in the refrigerator. To bake bread or other recipes using sourdough yeast, draw from this jar. For this recipe, place 55g starter in a new and larger jar. Feeding ratio is 1:1:1 (1 part starter @55g, 1 part water @55g and 1 part bread flour @55g). Alternatively, do a 1:2:2 feeding ratio (1 part starter @35g, 2 parts water @70g and 2 parts bread flour @70g). Using a pair of chopsticks or a long spoon, stir until well combined. Allow 4-6 hours for yeast to double before using – measure out 155g for the recipe.
Photos: Nick D. Edwards
Click on STORM-Asia/food for more recipes and reviews of restaurants.
If you have a simple recipe to share, please email it whipitup@storm.sg.
You may like to try these recipes:
Grilled Lobster With Asian Soy Dressing


